Spring is here and I'm a mess. I have horrible allergies and I have to stay home most of the time instead of going outside and enjoying my day. Even though I haven't been able to go outside, it hasn't been all bad. The extra time gave me the opportunity to make a new Pokémon drawing tutorial for you all. When I think of spring, I think of flowers; therefore, I decided to draw Bellossom. Alright, let's get into it. I hope you guys enjoy the tutorial!
Here is what you will need:
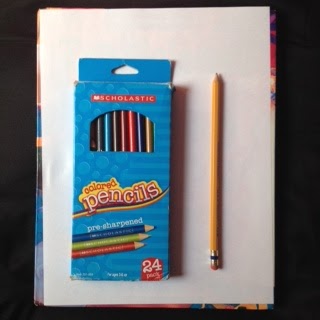
- 1 sheet of blank paper
- A pencil with an eraser
- Colored pencils (optional)
- Ruler (optional)
Step 1:

1. Draw four circles. The first circle, Bellossom's head, should be about 3 inches below the top of your paper and it should be 2 inches in length and 2.5 inches in width. The second and third circles, Bellossom's flower centers, should be about .5 inches in length and width. Lastly, the fourth circle, Bellossom's body should be about 3.5 inches in length and width.
Step 2:

2. Draw an oval inside Bellossom's flower center. Then, draw five flower petals around the flower center. You can achieve this by drawing a C (green in image) for the sides and another C (red in image) for the top.
Step 3.

3. Repeat Step 2 a second time on Bellossom's other flower center.
Step 4:

4. Draw a circle two circles (grey in image) for Bellossom's eye. Then, draw two other smaller circles (yellow in image) for Bellossom's pupils. Next, draw a small C (red in image) in the corner of Bellossom's eye. This curve will act as Bellossom's iris.
For Bellossom's mouth, draw an upside down C (red in image). Then, draw another upside down C (grey in image) right underneath the C you just drew. Finally, draw one last C (yellow in image). The last C is Bellossom's tongue.
Lastly, draw two ovals (green in image) on both sides of Bellossom's face. These are Bellossom's cheeks.
Step 5:

5. Draw a big curve ( big red C in image) that connects to Bellossom's head, and then draw two lines (big yellow lines in image) to form Bellossom's arms. Next, to the very top line, add another little line (small yellow line in image) to symbolize Bellossom's body. Then, draw another C (green in image) that connects the two yellow lines.
Repeat the steps above for Bellossom's second arm with the exception of drawing a big curve (big red C in image). Instead of doing a big curve, draw a smaller one (small red C in image) that connects both arms together.
Step 6:

6. Draw a big curve (red in image) and a backwords C (yellow in iamge). Then, draw another curve (green in image) that stops where Bellossom's body begins.
Step 7:

7. Draw two side-by-side- leaves that are almond shaped. You can achieve this shape by drawing a curve (red in image) and another curve (yellow in image).
Step 8:

8. Similar to step 6, draw another leaf that connects to the one you just created.
Step 9:

9. Draw a curve (red in image) and connect it to another curve (green in image). This is another petal this is underneath the two big ones you previously created. Lastly, draw four triangles (yellow in image) in the gaps between in the petals.
Step 10:


10. Admire your Bellossom! I strongly recommend you clean up your drawing by erasing any excess lines. This makes your drawing look a lot more polished. If you want, you can also color your Bellossom to give it a little bit more life. Above is a side-by-side comparison of the colored and uncolored Bellossom.
Thank you guys for taking the time to read my tutorial and made a Bellossom as well. I hope you guys enjoyed the tutorial and I plan on making more of these tutorials in the future. If you enjoyed this tutorial, don't forget to stay stuned for more!
- The Pokémon Master