Hey Pokémon fans!
Spring is here and I'm a mess. I have horrible allergies and I have to stay home most of the time instead of going outside and enjoying my day. Even though I haven't been able to go outside, it hasn't been all bad. The extra time gave me the opportunity to make a new Pokémon drawing tutorial for you all. When I think of spring, I think of flowers; therefore, I decided to draw Bellossom. Alright, let's get into it. I hope you guys enjoy the tutorial!
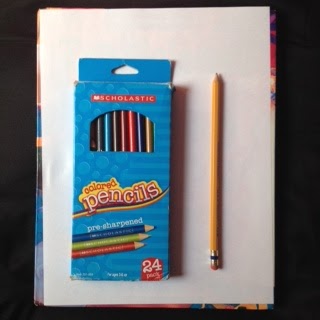
Here is what you will need:
- 1 sheet of blank paper
- A pencil with an eraser
- Colored pencils (optional)
- Ruler (optional)
Step 1:
1. Draw four circles. The first circle, Bellossom's head, should be about 3 inches below the top of your paper and it should be 2 inches in length and 2.5 inches in width. The second and third circles, Bellossom's flower centers, should be about .5 inches in length and width. Lastly, the fourth circle, Bellossom's body should be about 3.5 inches in length and width.
Step 2:
2. Draw an oval inside Bellossom's flower center. Then, draw five flower petals around the flower center. You can achieve this by drawing a C (green in image) for the sides and another C (red in image) for the top.
Step 3.
3. Repeat Step 2 a second time on Bellossom's other flower center.
Step 4:
4. Draw a circle two circles (grey in image) for Bellossom's eye. Then, draw two other smaller circles (yellow in image) for Bellossom's pupils. Next, draw a small C (red in image) in the corner of Bellossom's eye. This curve will act as Bellossom's iris.
For Bellossom's mouth, draw an upside down C (red in image). Then, draw another upside down C (grey in image) right underneath the C you just drew. Finally, draw one last C (yellow in image). The last C is Bellossom's tongue.
Lastly, draw two ovals (green in image) on both sides of Bellossom's face. These are Bellossom's cheeks.
Step 5:
5. Draw a big curve ( big red C in image) that connects to Bellossom's head, and then draw two lines (big yellow lines in image) to form Bellossom's arms. Next, to the very top line, add another little line (small yellow line in image) to symbolize Bellossom's body. Then, draw another C (green in image) that connects the two yellow lines.
Repeat the steps above for Bellossom's second arm with the exception of drawing a big curve (big red C in image). Instead of doing a big curve, draw a smaller one (small red C in image) that connects both arms together.
Step 6:
6. Draw a big curve (red in image) and a backwords C (yellow in iamge). Then, draw another curve (green in image) that stops where Bellossom's body begins.
Step 7:
7. Draw two side-by-side- leaves that are almond shaped. You can achieve this shape by drawing a curve (red in image) and another curve (yellow in image).
Step 8:
8. Similar to step 6, draw another leaf that connects to the one you just created.
Step 9:
9. Draw a curve (red in image) and connect it to another curve (green in image). This is another petal this is underneath the two big ones you previously created. Lastly, draw four triangles (yellow in image) in the gaps between in the petals.
Step 10:
10. Admire your Bellossom! I strongly recommend you clean up your drawing by erasing any excess lines. This makes your drawing look a lot more polished. If you want, you can also color your Bellossom to give it a little bit more life. Above is a side-by-side comparison of the colored and uncolored Bellossom.
Thank you guys for taking the time to read my tutorial and made a Bellossom as well. I hope you guys enjoyed the tutorial and I plan on making more of these tutorials in the future. If you enjoyed this tutorial, don't forget to stay stuned for more!
- The Pokémon Master
The Pokémon Master
Thursday, April 7, 2016
Sunday, February 28, 2016
20 Years of Pokémon
What's up Pokémon fans?
As most of you know, it was Pokémon's 20th anniversary yesterday. To kick off the anniversary, Pokémon is giving away legendary Pokémon video game codes each month. Below is a chart about which Pokémon will be given out each month, and you can get these codes from places like Gamestop.
The Pokémon Company has released a ton of different things to celebrate their 20th anniversary, so if you're interested in finding out more feel free to go to their website. That's all for today, Pokémon fans, and I hope you all have a great day today!
- The Pokémon Master
As most of you know, it was Pokémon's 20th anniversary yesterday. To kick off the anniversary, Pokémon is giving away legendary Pokémon video game codes each month. Below is a chart about which Pokémon will be given out each month, and you can get these codes from places like Gamestop.
In addition to the free Pokémon, the Pokémon Company also released the original Pokémon Red, Blue, and Yellow video games for Nintendo 3DS. The games are pixelated and have 4-bit background music. Pokémon Yellow is also in color. I have attached a video of what the video games will look like on your screen below.
Lastly, new merch has been released as well. Most of the merch has the exclusive new Pokémon 20th anniversary design. The design is a Pikachu made up of all the starter Pokémon from previous generations. Clothing like hats and shirts have been released and, if you ask me, they are pretty cool.
Pokémon Hat Link |
Pokémon Shirt Link |
- The Pokémon Master
Tuesday, February 9, 2016
Pokémon Go!
Hello Pokémon fans!
I just came home from school, and I was scrolling through the internet when I found news on the Pokémon Go game. If you don't know what Pokémon Go is, it is an augmented reality game. This basically means that computers are generating images on a user's view on the world. I know it might sound extremely complicated, but I'm sure the Pokémon Company will not disappoint with this new piece of media.
The article I was reading broke down what Pokémon Go is, so I definitely recommend reading it if you want to know more about the device. Andrew Webster, the author of the article, mentioned that the Nintendo is going to work with the Pokémon Company to develop a Blue-tooth enabled device that will light up and vibrate whenever you approach a Pokémon in the real world. This accessory is called the Pokémon Go Plus.
I don't know about you guys, but I have so much hope in the device. I know that there has been a lot of controversy with the Pokémon Go game because it's something that just seems to complicated to create. I think that the Pokémon Company is taking a big leap with the game, but in the end I hope everything goes as planned.
The game is a collaboration with DeNa and Nintendo, and if the game does release, I think it will change the gaming industry forever. I'm really excited for this game and I know Nintendo will do a good job. I'm all for change and I know that Pokémon Go will definitely change people's perspectives on video games.
Well thats my opinion on Pokémon Go, but what's yours? Please feel free to comment your thoughts and onions in the comment section below this post!
- The Pokémon Master
I just came home from school, and I was scrolling through the internet when I found news on the Pokémon Go game. If you don't know what Pokémon Go is, it is an augmented reality game. This basically means that computers are generating images on a user's view on the world. I know it might sound extremely complicated, but I'm sure the Pokémon Company will not disappoint with this new piece of media.
The article I was reading broke down what Pokémon Go is, so I definitely recommend reading it if you want to know more about the device. Andrew Webster, the author of the article, mentioned that the Nintendo is going to work with the Pokémon Company to develop a Blue-tooth enabled device that will light up and vibrate whenever you approach a Pokémon in the real world. This accessory is called the Pokémon Go Plus.
Pokémon Go Plus |
The game is a collaboration with DeNa and Nintendo, and if the game does release, I think it will change the gaming industry forever. I'm really excited for this game and I know Nintendo will do a good job. I'm all for change and I know that Pokémon Go will definitely change people's perspectives on video games.
Well thats my opinion on Pokémon Go, but what's yours? Please feel free to comment your thoughts and onions in the comment section below this post!
- The Pokémon Master
Thursday, January 7, 2016
New Year Resolutions Round 2
Hi Pokémon Fans!
It's finally 2016 and I can't believe how fast time flies. I started this blog the beginning of my freshman year, and now it's almost the end of my sophomore year. I remember typing one of these posts in January of last year and now I'm typing one again. Alright, nostalgic things aside, let's get into resolutions!
Nurse Joy GIF Link |
#1 Resolution: Post
Squirtle Img Cred |
#2 Resolution: Draw
My Squirtle drawing ended up being a huge hit! I'm really glad it got so much positive feedback from the people I know and I will continue to draw more Pokémon. It's time to give the people what they want in 2016 and I'm happy to provide it. I love drawing and I'm glad people want me to continue doing so. I'm thinking about drawing Charmander next time, but if there are any other Pokémon you'd like to see, please feel free to leave a comment at the end of this post.
I believe that's all for now. I hope you guys all had a wonderful day today and be sure to stay tuned to see my future posts and drawings!
- The Pokémon Master
Sunday, October 25, 2015
How To: Draw Squirtle
Hey guys!
Today, I'll be teaching you how to draw one of Pokémon's most beloved characters, Squirtle! Squirtle is one of my favorites and I felt like it was time Squirtle had a portrait done on my blog. This is a very detailed tutorial and I hope you enjoy!
Here is what you will need:
- 1 sheet of blank paper
- A pencil
- An eraser
- Colored pencils (optional)
- Ruler (optional)
Step 1:
1. Draw two circles. The first circle, Squirtle's body, should be somewhat oval-like, but still circular. My Squirtle's body was about 3 inches in length and width. The second circle is Squirtle's head. My Squirtle's head was about 2 inches in length and width.
Next, draw five ovals of various lengths depending on how big you want your Squirtle's body parts. Mine were all about an inch in length and width. These will act as Squirtle's arms, tail, and feet.
Step 2:
2. Draw five C's (red in image) and connect them. These will act as Squirtle's tail.
Step 3:
3. Draw two C's (red in image) and attach them to Squirtle's body.
Then, on the C to the right, draw a straight line (yellow in image) that passes a few centimeters below the other C.
Finally, draw three little trangles (green in image) that will act as Squirtle's toes.
Step 4:
4. Draw three more triangles on Squirtle's second leg. These will act as the toes as well.
Step 5:
5. Draw a straight line that connects Squirtle's body to his arm (yellow top line in image).
Next, draw a small C, that connects to the straight line (red in image). Draw two triangles (green in image) that connect to the C and another in the middle of the arm (grey in image).
Finally, draw another straight line (yellow bottom line in image) that connects the last triangle to Squirtle's body.
Step 6:
6. Draw a triangle (green in image) on your other Squirtle's arm.
Then, draw two other triangles (grey in image) a little below the middle of Squirtle's arm.
Step 7:
7. Draw two squiggly lines by drawing multiple little C's on their back and fronts (small red C's in image).
Next, draw a big curve that connects the start of the squiggly line to the end (big red curve in image).
Then, add two curves to the shell (yellow in image).
Lastly, erase the part of Squirtle's tail that intercepts with the shell (gray curve below the yellow one in image).
Step 8:
8. Draw a curve (red in image) a couple centimeters below Squirtle's head that connects to his body and arm.
Next, draw a plus sign (yellow in image) that connects to the curve you just made but not the rest of Squirtle's body.
Finally, make three triangles (green in image) that connect the plus sign to Squirtle's body.
Step 9:
9. Draw a small backwards S (red in image) on the bottom left side of Squirtle's face.
Next, draw two almond-like eyes (blue curves in image). Squirtle also has two curves on the inside of his eyes that act as his iris (white curve in image) and his sclera (orange curve in image).
Then, draw two oval pupils (purple in image) at the top of Squirtle's eye.
After that, draw two small lines above and below Squirtle's eyes (yellow in image). These lines are Squirtle's nose and eyebrows.
Lastly, draw a squiggly line (grey in image) in the middle of Squirtle's face. This is Squirtle's mouth.
Step 10:
10. Admire your finished Squirtle! If you want, you can color it as well. Above is a side by side comparison of the colored and uncolored Squirtle.
I'd like to thank everyone who stuck around through all my instructions and made a Squirtle drawing of their own. I hope you all enjoyed this tutorial and I plan to make more How To's in the future, so don't forget to stay tuned!
- The Pokémon Master
Today, I'll be teaching you how to draw one of Pokémon's most beloved characters, Squirtle! Squirtle is one of my favorites and I felt like it was time Squirtle had a portrait done on my blog. This is a very detailed tutorial and I hope you enjoy!
Here is what you will need:
- 1 sheet of blank paper
- A pencil
- An eraser
- Colored pencils (optional)
- Ruler (optional)
Step 1:
1. Draw two circles. The first circle, Squirtle's body, should be somewhat oval-like, but still circular. My Squirtle's body was about 3 inches in length and width. The second circle is Squirtle's head. My Squirtle's head was about 2 inches in length and width.
Next, draw five ovals of various lengths depending on how big you want your Squirtle's body parts. Mine were all about an inch in length and width. These will act as Squirtle's arms, tail, and feet.
Step 2:
2. Draw five C's (red in image) and connect them. These will act as Squirtle's tail.
Step 3:
3. Draw two C's (red in image) and attach them to Squirtle's body.
Then, on the C to the right, draw a straight line (yellow in image) that passes a few centimeters below the other C.
Finally, draw three little trangles (green in image) that will act as Squirtle's toes.
Step 4:
4. Draw three more triangles on Squirtle's second leg. These will act as the toes as well.
Step 5:
Next, draw a small C, that connects to the straight line (red in image). Draw two triangles (green in image) that connect to the C and another in the middle of the arm (grey in image).
Finally, draw another straight line (yellow bottom line in image) that connects the last triangle to Squirtle's body.
Step 6:
6. Draw a triangle (green in image) on your other Squirtle's arm.
Then, draw two other triangles (grey in image) a little below the middle of Squirtle's arm.
Step 7:
7. Draw two squiggly lines by drawing multiple little C's on their back and fronts (small red C's in image).
Next, draw a big curve that connects the start of the squiggly line to the end (big red curve in image).
Then, add two curves to the shell (yellow in image).
Lastly, erase the part of Squirtle's tail that intercepts with the shell (gray curve below the yellow one in image).
Step 8:
8. Draw a curve (red in image) a couple centimeters below Squirtle's head that connects to his body and arm.
Next, draw a plus sign (yellow in image) that connects to the curve you just made but not the rest of Squirtle's body.
Finally, make three triangles (green in image) that connect the plus sign to Squirtle's body.
Step 9:
9. Draw a small backwards S (red in image) on the bottom left side of Squirtle's face.
Next, draw two almond-like eyes (blue curves in image). Squirtle also has two curves on the inside of his eyes that act as his iris (white curve in image) and his sclera (orange curve in image).
Then, draw two oval pupils (purple in image) at the top of Squirtle's eye.
After that, draw two small lines above and below Squirtle's eyes (yellow in image). These lines are Squirtle's nose and eyebrows.
Lastly, draw a squiggly line (grey in image) in the middle of Squirtle's face. This is Squirtle's mouth.
Step 10:
10. Admire your finished Squirtle! If you want, you can color it as well. Above is a side by side comparison of the colored and uncolored Squirtle.
I'd like to thank everyone who stuck around through all my instructions and made a Squirtle drawing of their own. I hope you all enjoyed this tutorial and I plan to make more How To's in the future, so don't forget to stay tuned!
- The Pokémon Master
Thursday, September 24, 2015
The End of a Hiatus
Hey everyone!
It's been awhile since I've posted on this blog, but I'm finally back. I took a short break during the summer, but school started again so it's time to used this blog as an outlet away from school related things. I hope you guys had a wonderful summer and I can't wait to talk to you all about Pokémon soon.
For all the people who are new to my blog, hi and welcome! My name is Gisselle Aguilera and I'm 15 years old. I'm a sophomore who is currently trying to survive high school. I live in California and I love to roller blade. I'm also a big fan of Game of Thrones, Bates Motel, and The Walking Dead. I'm a video game enthusiast and my first ever video game was Pokémon FireRed. I basically like to think of myself as the female equivalent of Gene Belcher. If you don't know who Gene is, here is a GIF of him in action:
In all seriousness, I really enjoy talking about Pokémon so I use this blog in order to do just that. Ever since I was a child, Pokémon has always been something I've held close to my heart. I write this blog in order to keep those memories and feelings flowing. You guys can look forward to seeing multiple tutorials and facts about Pokémon, and I hope they peek your interests as much as they do mine.
- The Pokémon Master
Sunday, April 12, 2015
How To: Evolve Your Pokémon With Evolutionary Stones
Hello guys, it's been quite a while since I have updated this blog. I hope you are all having a wonderful day today and here's a quick how to on how to evolve Pokémon using an evolutionary stone.
Background Information:
An evolutionary stone is a stone-like item that aids some species of Pokémon in their evolutionary process. Evolutionary stones can be used any time you want, causing the Pokémon of your choice to evolve instantly. Besides the Everstone, which must be held in order for the evolution to occur, all stones can be directly applied to all Pokémon.
Some types of stones work better on a Pokémon's specific type. For example, if you want to evolve a Charmander, it'd be best to use a fire stone instead of a water stone because Charmander is a Fire Type; therefore, the stone would actually evolve the Charmander.
Evolutionary Stone Tutorial:
Step 1: Choose the Pokémon you would like to evolve. I'll be using Bulbasaur for this example.
Step 2: Choose the Evolutionary Stone that would best fits the type of Pokémon you will be evolving. Since Bulbasaur is a grass type, then the Leaf Stone would be the best pick. You can purchase stones in certain stores or find them in Poké Balls when you're on your journey.
Step 3: Go to your "Bag" and find the stone you will be using. After doing so, click on it and it will give you some choices. In this case, you will click the "Use" button.
Step 4: Select the Pokémon you want to use the stone on. Then, watch as the evolutionary process occurs!
I hope you guys enjoyed this quick little tutorial, and be sure to stay tuned for more Pokémon related things!
- The Pokémon Master
Background Information:
http://rosa-pegasus.deviantart.com/art/PKMN-Evolution-Stones-464966938 |
An evolutionary stone is a stone-like item that aids some species of Pokémon in their evolutionary process. Evolutionary stones can be used any time you want, causing the Pokémon of your choice to evolve instantly. Besides the Everstone, which must be held in order for the evolution to occur, all stones can be directly applied to all Pokémon.
Some types of stones work better on a Pokémon's specific type. For example, if you want to evolve a Charmander, it'd be best to use a fire stone instead of a water stone because Charmander is a Fire Type; therefore, the stone would actually evolve the Charmander.
Evolutionary Stone Tutorial:
Step 1: Choose the Pokémon you would like to evolve. I'll be using Bulbasaur for this example.
http://guilhermeuzumaki.deviantart.com/art/bulbasaur-render-343632707 |
Step 2: Choose the Evolutionary Stone that would best fits the type of Pokémon you will be evolving. Since Bulbasaur is a grass type, then the Leaf Stone would be the best pick. You can purchase stones in certain stores or find them in Poké Balls when you're on your journey.
http://bulbapedia.bulbagarden.net/wiki/Evolutionary_stone |
Step 3: Go to your "Bag" and find the stone you will be using. After doing so, click on it and it will give you some choices. In this case, you will click the "Use" button.
http://www.wikihow.com/Evolve-Murkrow |
Step 4: Select the Pokémon you want to use the stone on. Then, watch as the evolutionary process occurs!
http://www.vizzed.com/play/pokemon-eeveelution-at-vizzedcom-gba-online-game-boy-advance-74740-game |
I hope you guys enjoyed this quick little tutorial, and be sure to stay tuned for more Pokémon related things!
- The Pokémon Master
Subscribe to:
Posts (Atom)